FAQ & Troubleshooting
-
My Dashboard->Node Detail page shows error message: "Node key lost, press 'Restore' button to resume."
The issue stems from an accidentally omitted key on your node. Locate the 'Restore' button in the upper-right corner of the Node Detail page to reinstate the key. The ARO Pod will return to operational status shortly. -
My Dashboard->Node Detail page shows error message: "This Agent version is not supported." or "Outdated Agent version detected."
The issue arises from an outdated version of the Agent software in your ARO Pod. Ensure your ARO Pod is connected to the internet and allow time for automatic updates. Restarting the ARO Pod may resolve the issue in some cases. -
My Dashboard->Node Detail page shows error message: "Restricted Region Detected!"
This is because we have detected that your node is operating in a restricted region, according to certain legal restrictions. This may result in the cancellation of your rewards. For more details on restricted regions, please refer to our Terms of Use. -
My Dashboard->Node Detail page shows error message: "Agent internal error".
There is an internal error in the node agent. Please provide your node's Serial Number and consult the technical support team from community channels (e.g. Official Discord). -
What network ports should be open?
To ensure proper connectivity and performance, please configure your firewall to allow the following inbound and outbound ports:✅ Inbound Ports
- UDP: All ports
- TCP:
80,443,9500–9700
🚀 Outbound Ports
- UDP:
40001–40100 - TCP:
443,30002,40001–40100
How could I improve my NAT type for ARO Pod?
Improving your NAT type will enhance your node performance (and your rewards!). However, this may need some "reconstruction" on how your device is connected to the internet. If you prefer to do the improvement, please follow instruction below.
Connect ARO Pod to the Internet
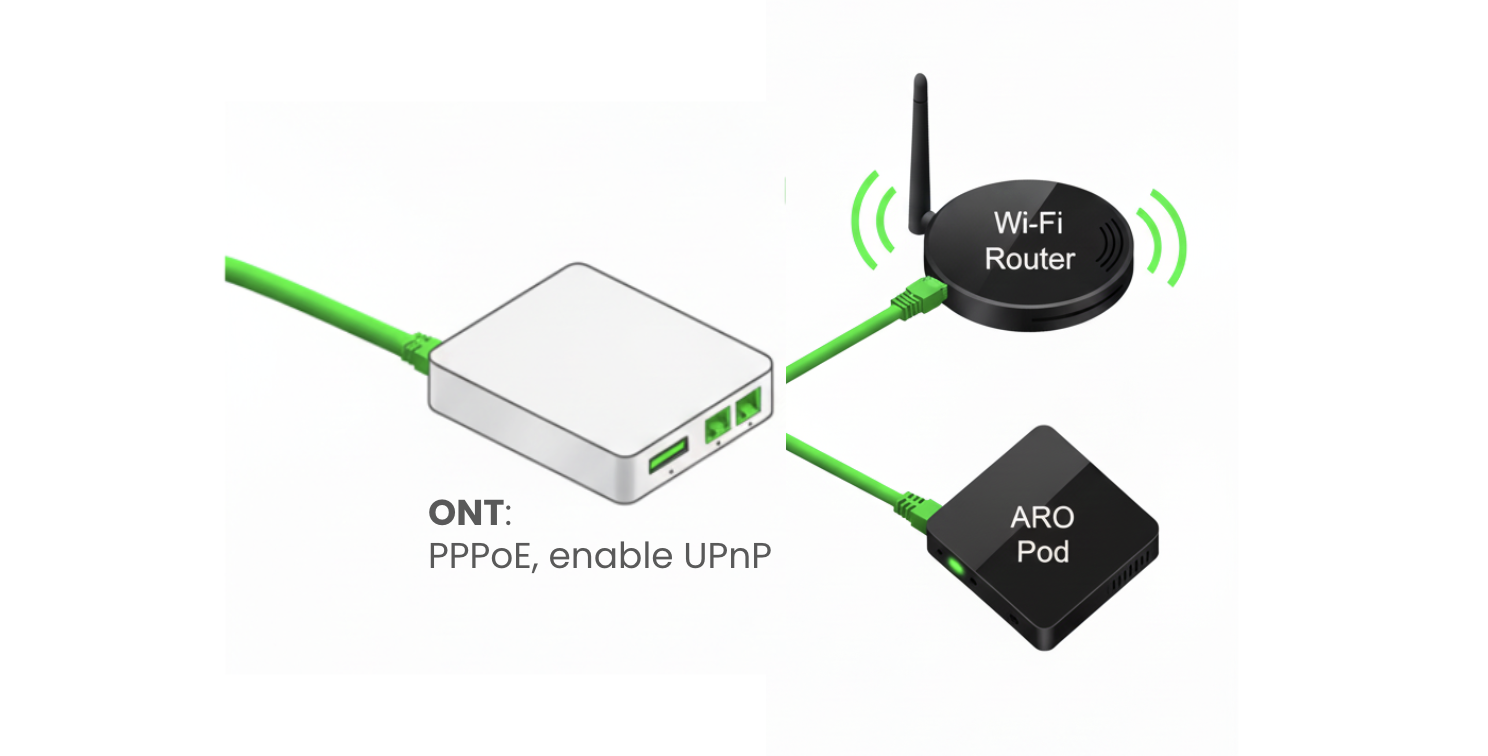
- Optical Networking Terminal (ONT) is the device at the end of a fiber optic network that converts the light signals from the fiber optic cable into signals that your devices can read, like routers and ARO Pod.
- Directly connect your ARO Pod to the ONT via Ethernet cable, as showed in the diagram above.
- DO NOT connect your ARO Pod to the Wi-Fi router!
- If you have a Wi-Fi router, connect it to the ONT from another Ethernet port so you can keep using it. If your ONT device only has one Ethernet port, you may use an extra Layer 2 Switch to extend the Ethernet port.
Enable UPnP on your ONT
- Connect to Your ONT: Connect a computer to the ONT using an Ethernet cable or connect to its Wi-Fi network.
- Look for a sticker on the ONT itself or in your network documentation to find its default IP address.
- Open a web browser and type the ONT's IP address into the address bar, then press Enter.
- Once logged in, look for an advanced or network settings menu. The UPnP setting is typically in a section such as:
- Advanced > Advanced Setup > UPnP
- More Functions > Network Settings > UPnP
- Network Settings > UPnP
- Tools > Misc. > UPnP Settings
- Select or check the option to turn UPnP on. Click the "Save" or "Apply" button to confirm your changes. For some devices, you may need to restart your ONT to apply the new settings.
For more information on the general concepts and approaches of optimizing your network, please refer to this guide