Installation & Initialization Tutorial for ARO Client
Part 1: ARO Client Deb Package Installation
1. Installation Preparation
- Install using the root user.
Debian 11or higher version of the Debian operating system.- A physical machine with
Debianinstalled, not a virtual machine.
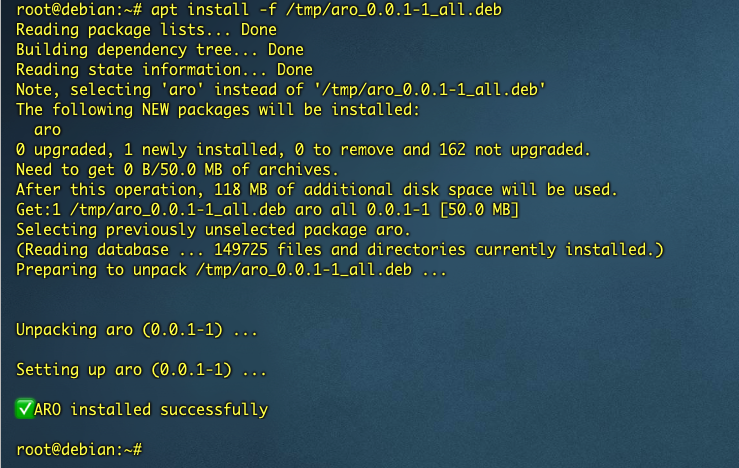
2. Install the Deb Package
Log in to the terminal, switch to the root user, and execute the following commands (replace the download URL and package name with the latest ones in the sample code below):
apt update

wget -O /tmp/aro-client-1.0.0.deb https://download.aro.network/files/deb/aro-client-1.0.0.deb

apt install -f /tmp/aro-client-1.0.0.deb
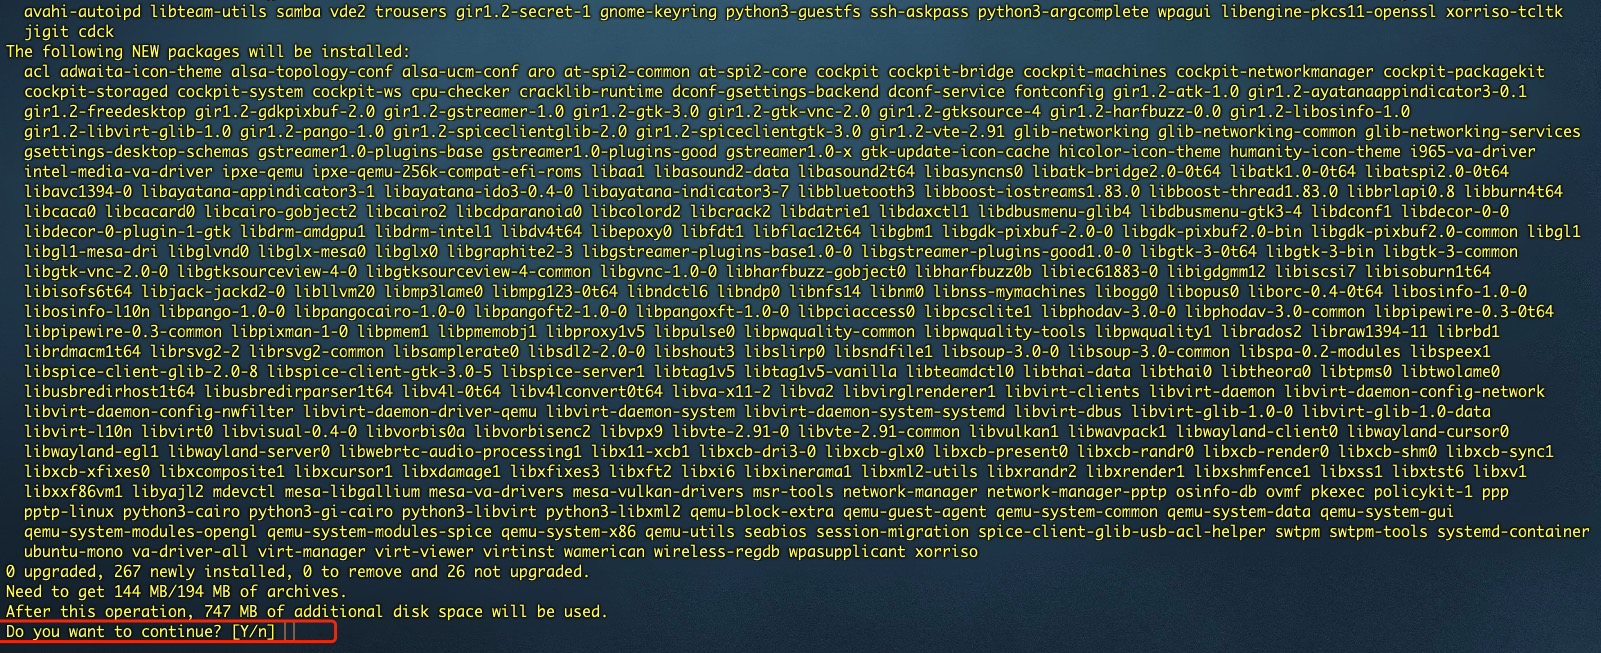
Enter Y to continue the installation.
3. Installation Error Scenarios
3.1 Non-Root User Installation
Installing with a non-root user will result in an error and exit the installation.

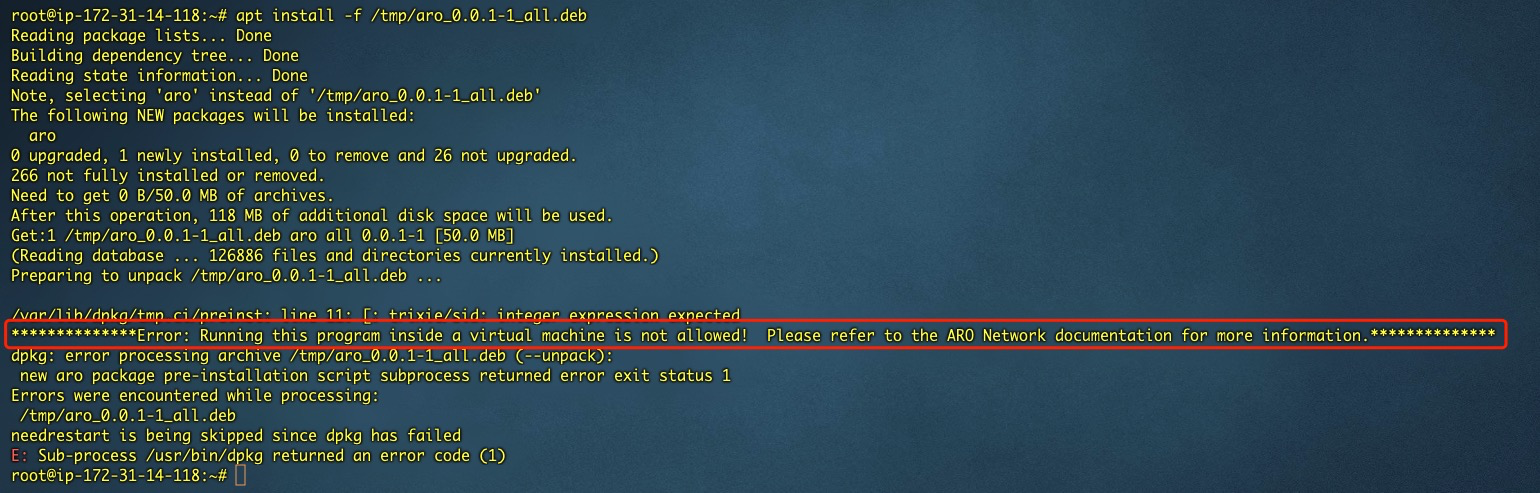
3.2 Virtual Machine Installation
Installing the deb package on a virtual machine will result in an error and exit the installation.
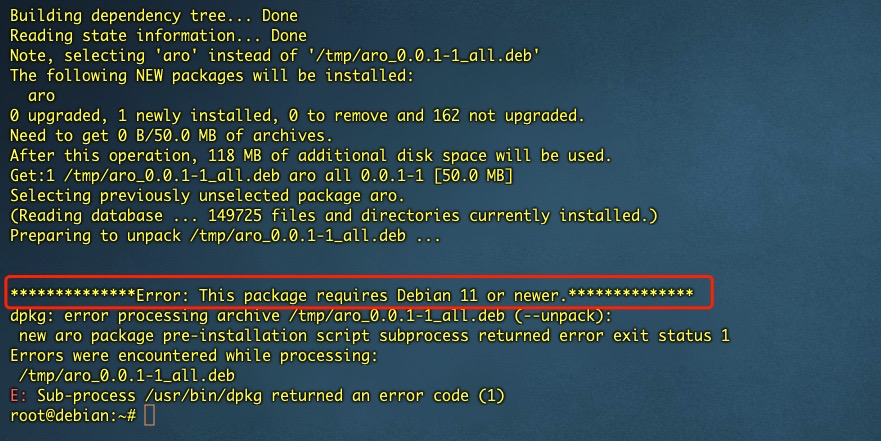
3.3 Installation on Debian Versions Below 11
4. Uninstall the Package
Execute the following command:
dpkg -P aro
Part 2: ARO Client Node Initialization & Configuration
This section describes how to register, configure and complete all initial setup needed for a functioning status for your ARO Client node.
Make sure you have already completed the Part 1 processes.
-
Get Your ARO Client Serial Number in the Web Console
Go to the ARO Client Web Console at[Your IP:40001]For example, if your IP is17.12.205.193, go to17.12.205.193:40001and you will access to the Web Console page. Find the 19-digit Serial Number (SN) on top area of the Web Console.
-
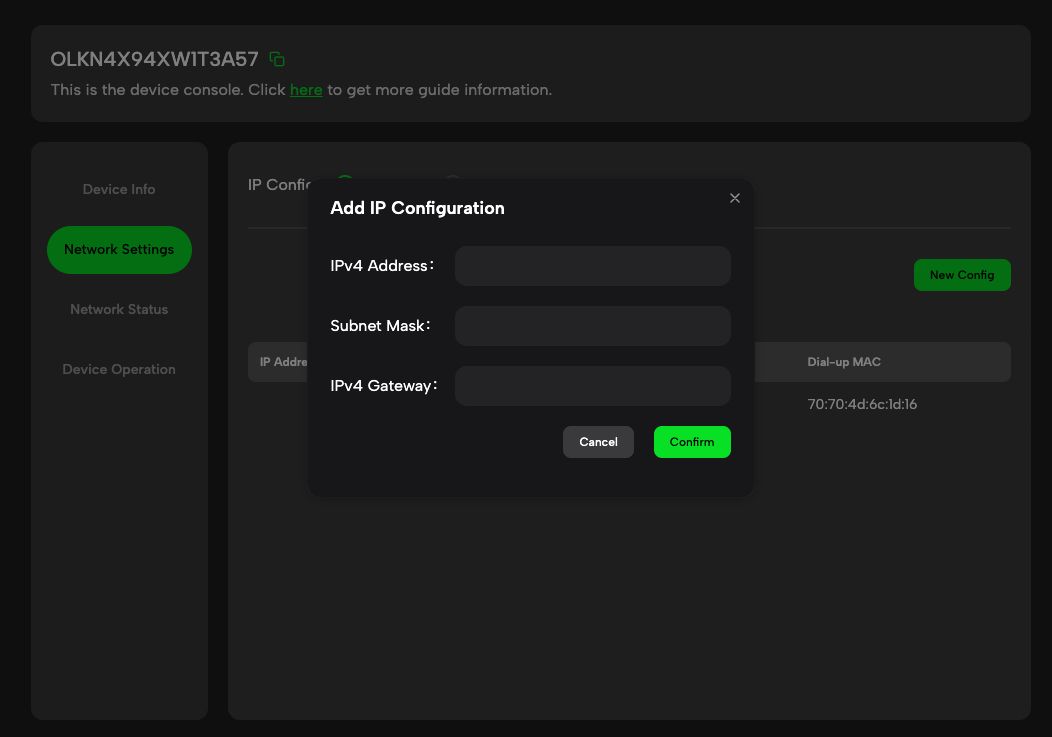
Configure Your Network
You can configure your network connection in the Web Console (if needed).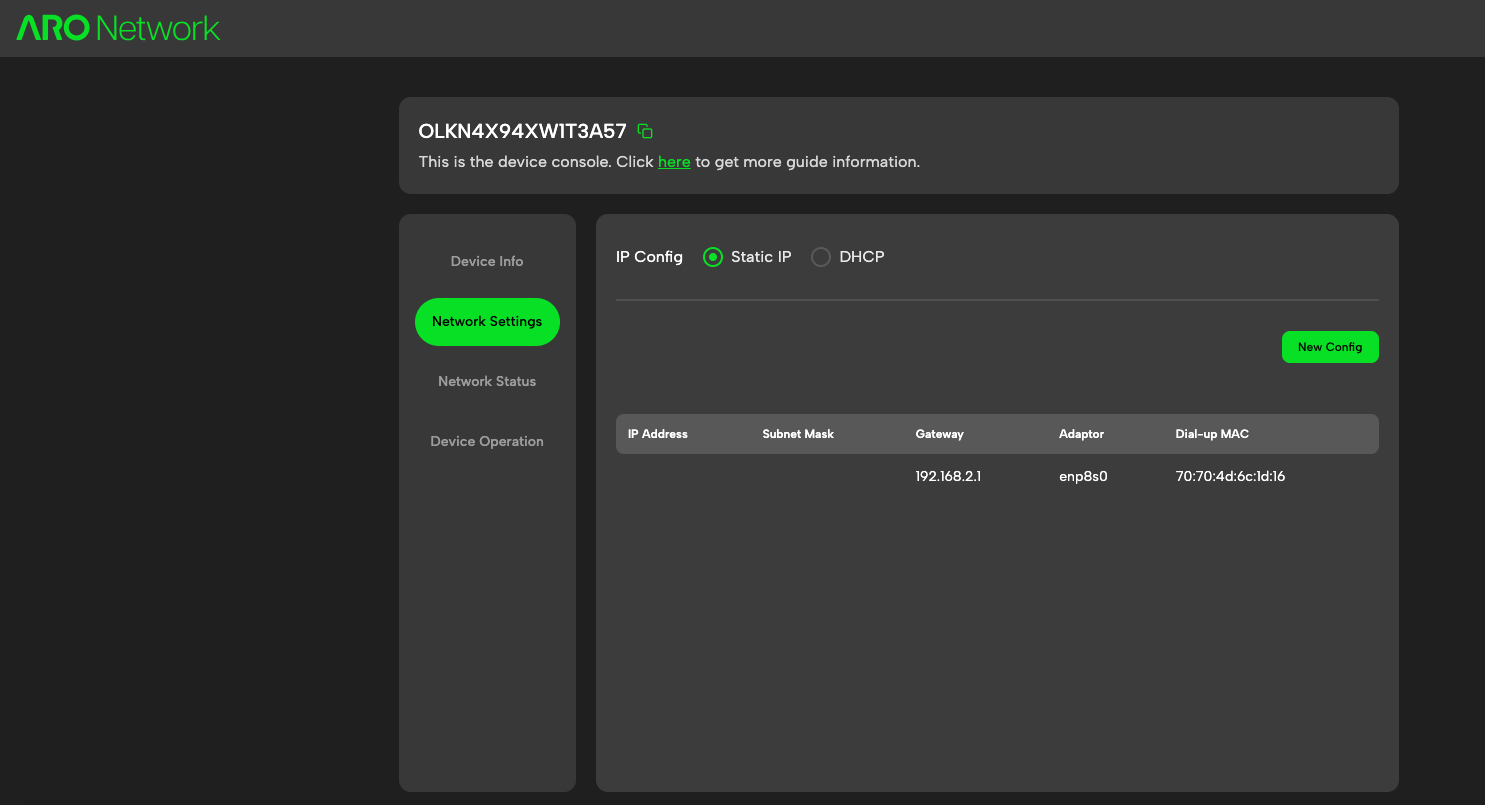
-
Initialize the Activation Process
Open the ARO Dashboard. Navigate to ARO Nodes > Add an ARO Client, follow steps and enter the 19-digit Serial Number found in your Web Console.
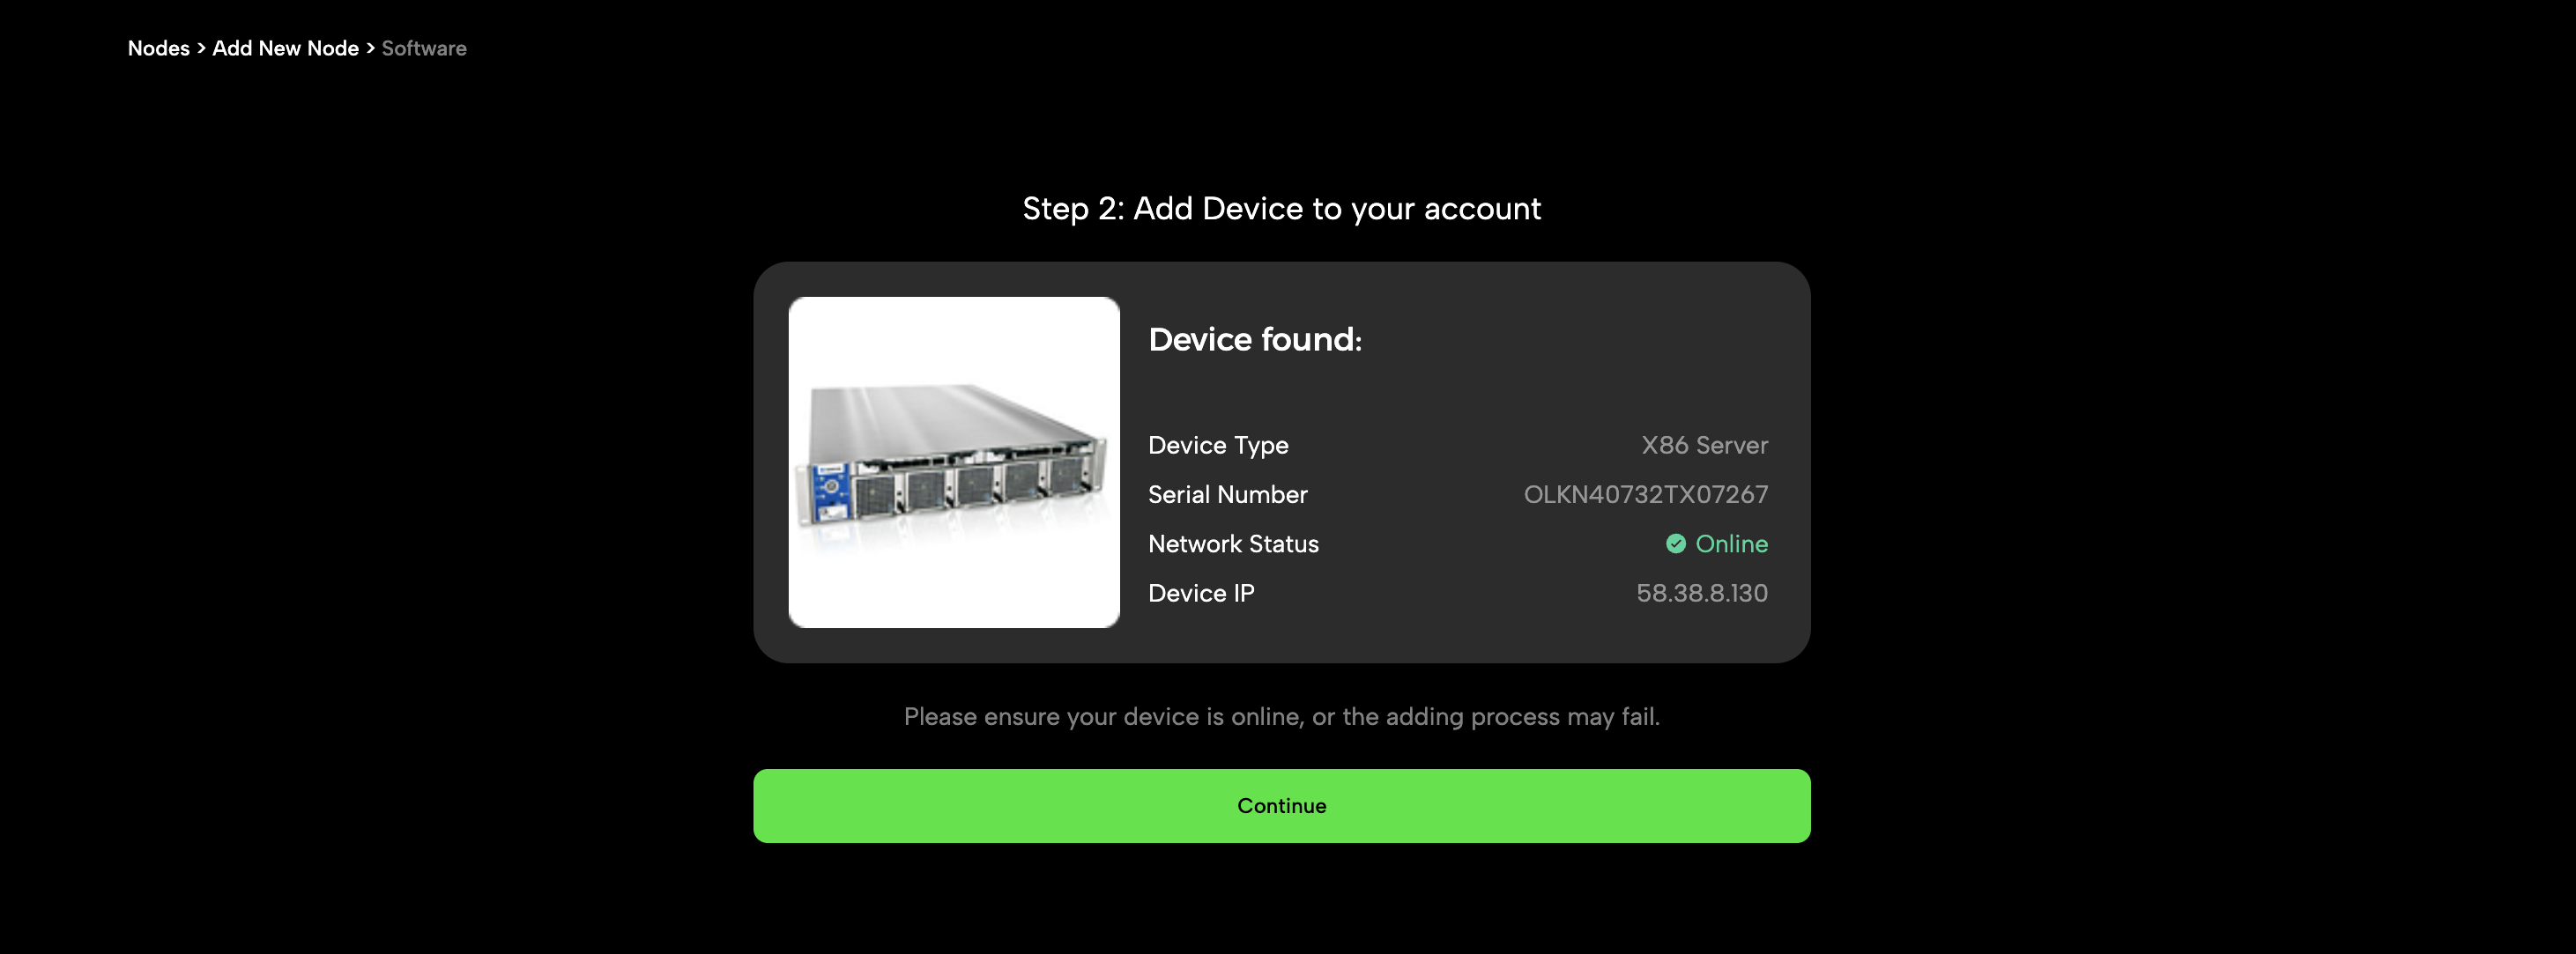
The dashboard will recognize the software image instance and display its information. Confirm to continue.Important: Ensure your ARO Client is online during activation. If it is offline, the process may fail.
-
Complete Setup
You will be guided to complete several simple steps for the initial configuration. As the Congratulations Page showes up, you have successfully set up your new ARO Client!